Integration of EIB/KNX sensors
After the connection to the EIB/KNX participants has been established with the ETS, create a new project. Here you create your topology and then add your devices.
Program your physical address as usual.
Now you have to parameterize your participants, in our example it is an EIB/KNX glass push-button from MDT (BE-GTT4S.01) This is parameterized as follows.
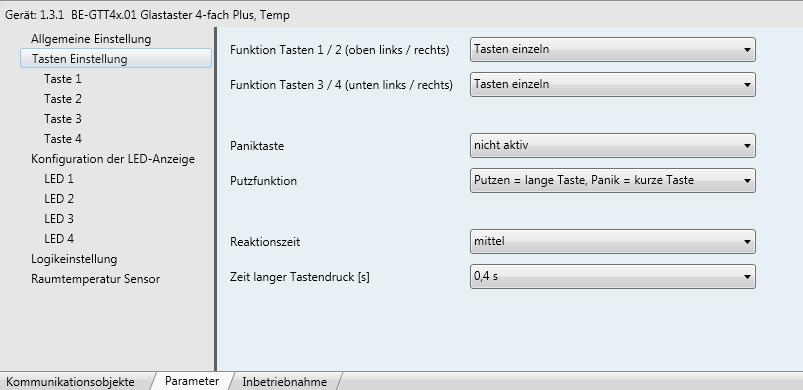
Step one:
Activate all keys (“single keys”)
Info: So that each push-button in COMEXIO can be used freely, you should always set the push-buttons to “Push-button individually”.
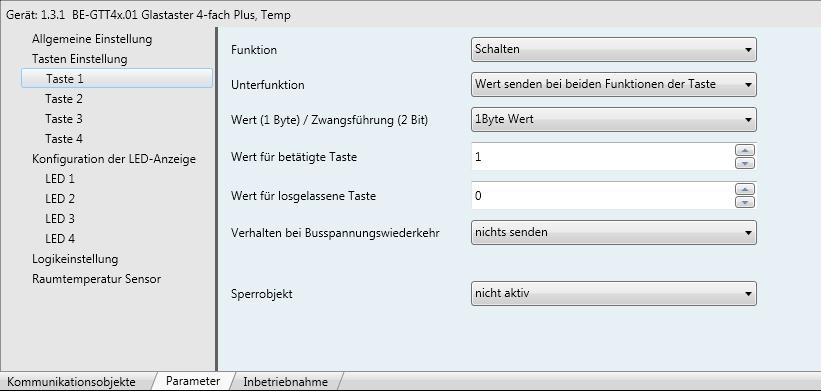
Step two:
Parameterize key 1-4 as follows:
Function: “Switching“
Sub-function: “Send value for both key functions”.
Value for key pressed:1
Value for key released: 0
Info: These parameters are important so that a conventional pushbutton can be simulated and a data point is freely available as an input in graphic programming.

Step three:
Activate respective LED, LED X reacts to “external object”.
Info: These parameters are important so that the status LED of COMEXIO can be freely controlled.
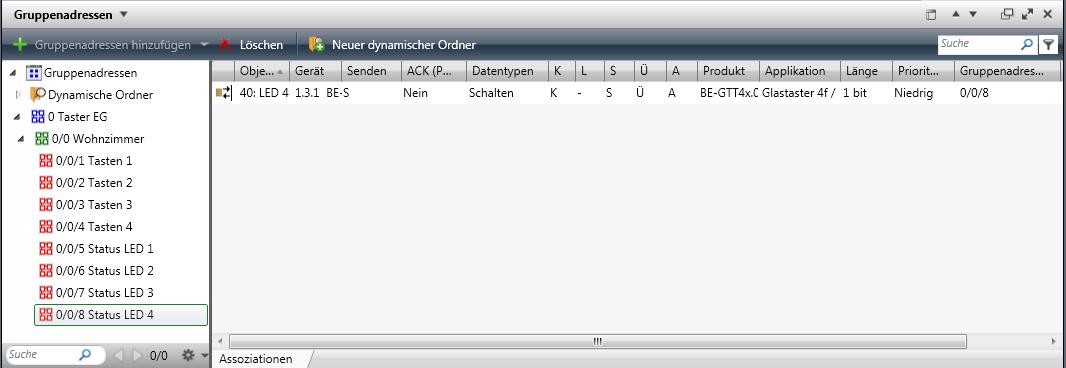
Step four:
Creating Group Addresses
Tip: Create a main group e.g. “Ground floor button”, here you add a middle group e.g. “Living room”. In the middle group “Living room”, create two groups with “Keys” and “Status” for each key for an overview.
Important: For identification, you need a separate group address for each parameter, i.e. in this case for each push-button and status LED.
As soon as you have assigned the respective functions to the group addresses and loaded the applications to the devices, all settings are completed with the ETS.
Step five:
Integrate EIB/KNX push-button into COMEXIO OS.
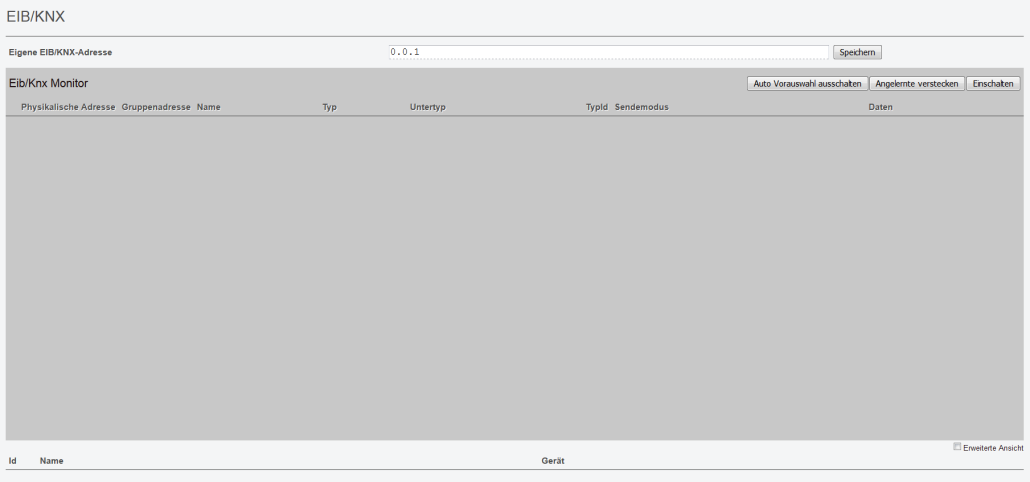
Open the menu item “EIB/KNX” and press the detail button.

The following window opens:
Step six:
Switch on EIB/KNX teach-in mode

To integrate EIB/KNX devices into COMEXIO OS, confirm the button “Switch on” in the EIB/KNX Monitor. All active participants that send a telegram appear.
- All EIB/KNX devices that have already been added are listed here; these are then made available in the graphical programming under the respective “Id”.
- Name: Enter a name that simplifies the assignment of the button. (e.g. “Button 1 Living room”)
- Type: for a pushbutton select here the type “binary” for a temperature measurement the type floating point number 2 Byte (optional setting).
- Subtype: for a pushbutton, select “Binary value”.
- Data: the current data point is displayed here (key “0” released, key “1” pressed).
- Extended view: by ticking the checkbox another column “Special” appears. Here you can set that only logical 1 is sent.
- Auto preselection: if this is activated, only the applicable type appears in the “Type” field (no selection option).
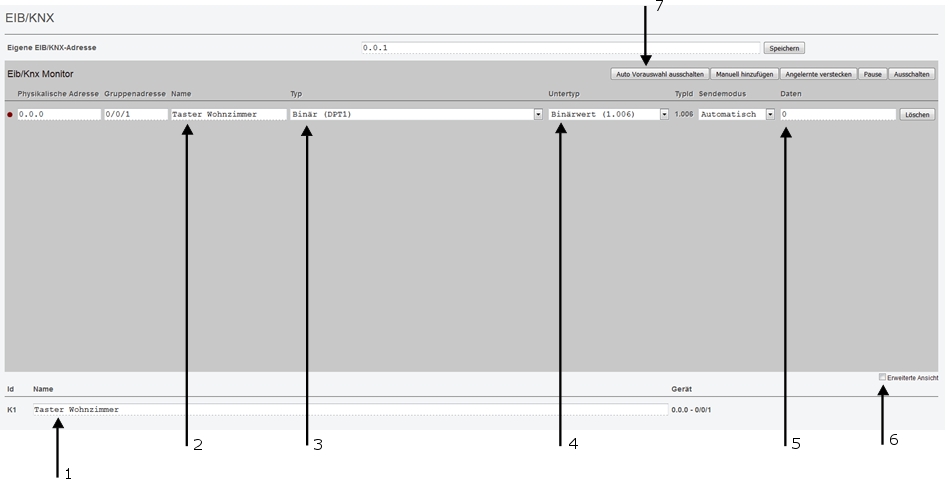
To be able to integrate the status LED press the button “Add manually”, the following menu window appears.

The data to be entered can easily be found in the ETS. Enter the data in the window and save.


In the graphic programming the data point with Id 6 is available after saving, this data point is marked with “K&”.

Step seven:
Creating a Logical Link
Example: Lighting is switched on and off with an EIB/KNX key via a COMEXIO output, a feedback of the switching status of the output takes place via the status LED of the key.
Add the required data points and logic modules to the function chart and link them accordingly.
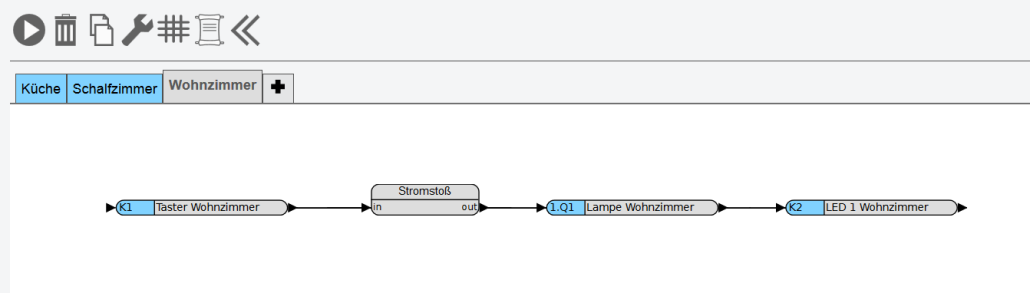
Test your programming by activating it with a click on the Play button.